Littman New Roof and
|
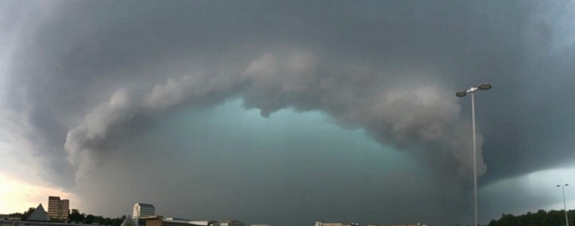
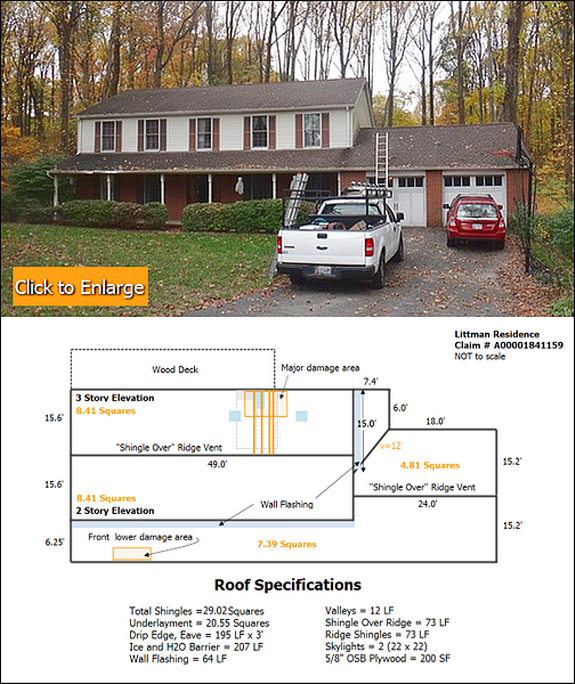 The Littmans in Laurel had their roof assaulted by a large poplar tree in the weather event shown below. |
|
|
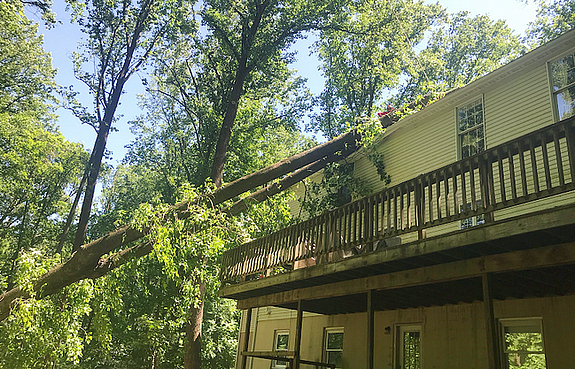 ...and here's the extra large tree that did all of the damage; it looks to be at least 60 feet tall! |
 |
 So, with two engineering reports in hand and negotiations now completed with the insurance company, we're getting ready to begin the rebuilding process. |
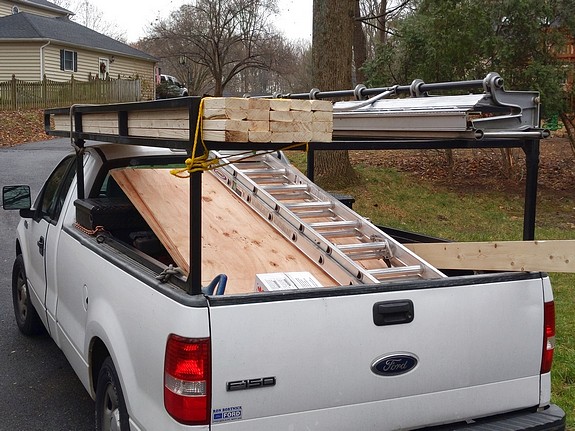
 Arriving are #2 SPF hand picked 2 x 4's and CDX plywood as specified by Vannoy Engineering. |
 |
 |
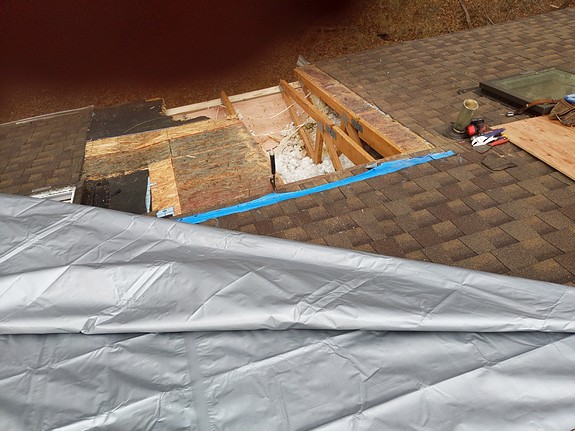
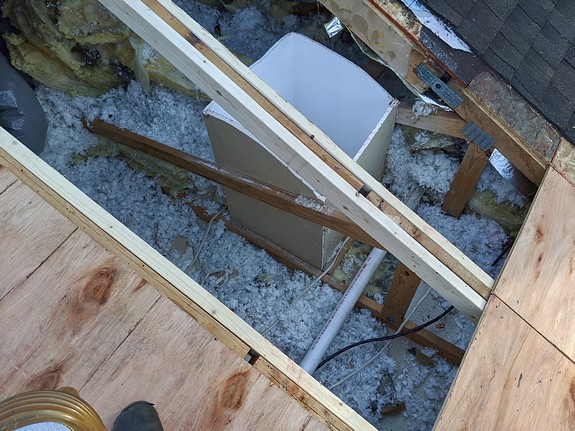
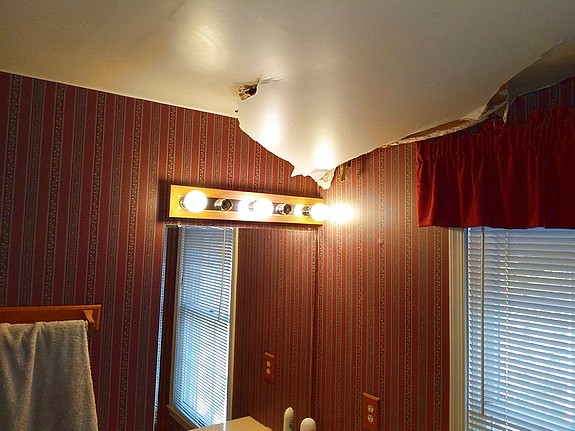 It's time for some forensics... The upper master bathroom roof was the first location to be hit by the big tree, so we'll start here... |
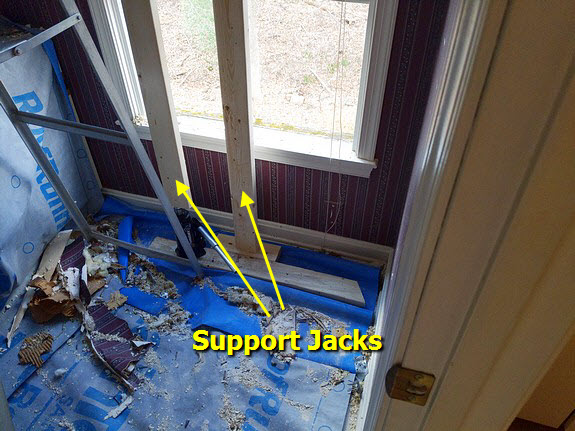
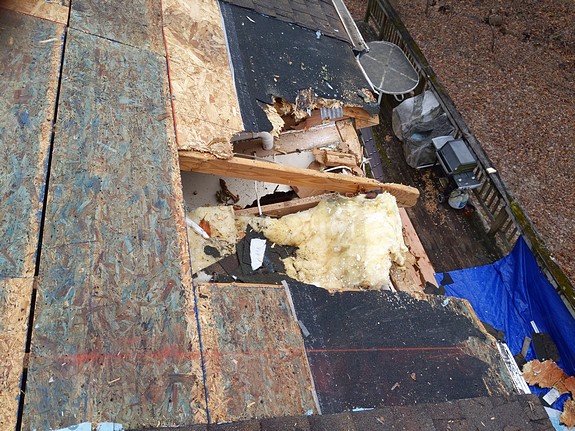
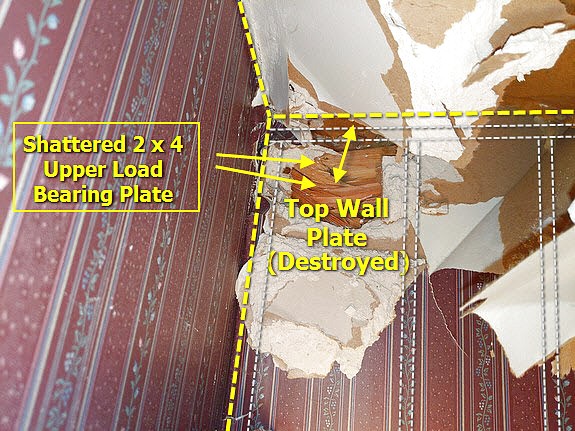 ... and the first thing we noticed was the top of the rear wall was destroyed. Funny thing, this was totally "missed" by all until we started to actually dig in. |
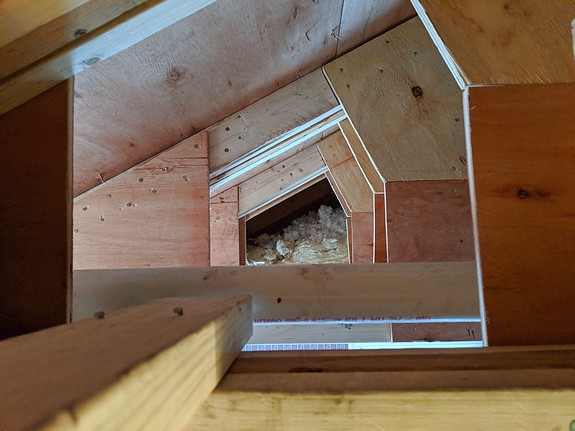
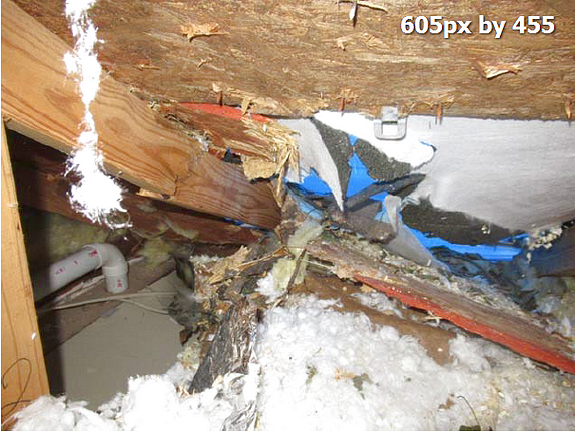 View of damage from inside the attic. It's a mess. |
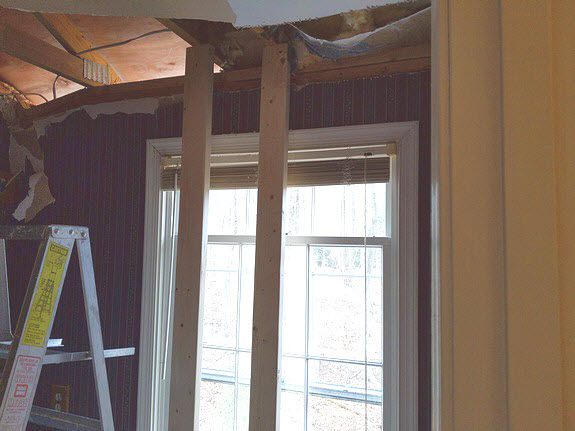
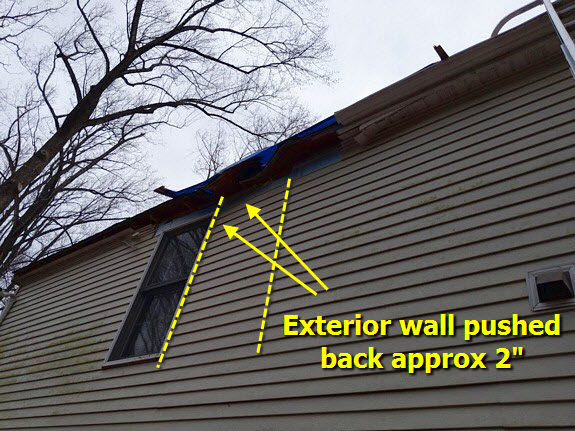 The first part of the construction process was to completely rebuild about 12 linear feet of the rear wall; it was shoved back about 2" right next to the window, and of course there was the completely shattered upper plate... |
 |
|
|
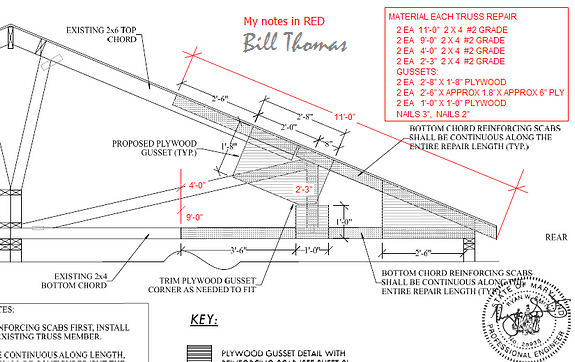
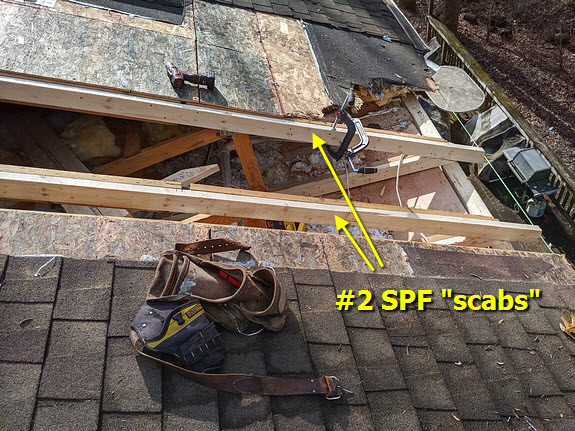
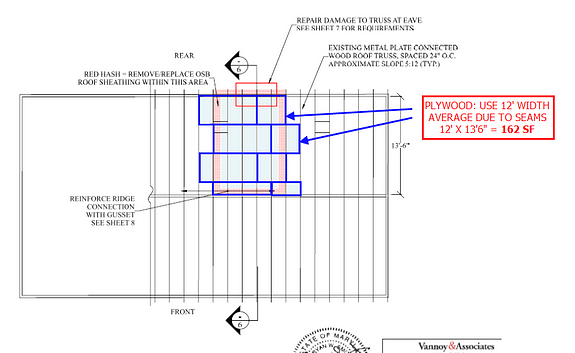 Above are the structural repair drawings provided by the engineers. We'll comply with their methodology ... leaving the original truss parts in play and "scabbing" 2 x 4's to them where recommended. |
 Since at least three trusses were damaged and hanging below ceiling level, they needed to be raised first -- just a little past their original position. |
 Once successfully raised, we can now continue with our assessment of the damage. |
 |
 But before more materials were removed, additional temporary waterproofing was necessary. |
 |
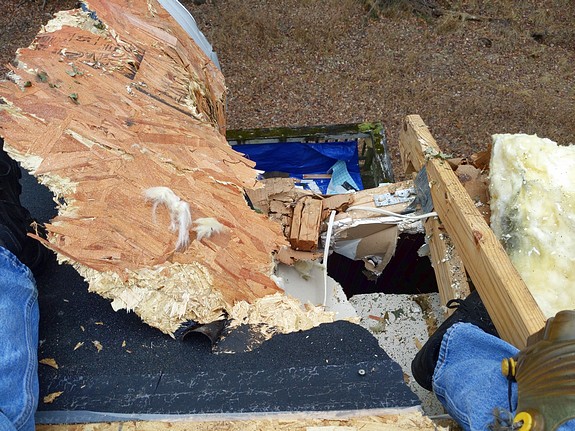
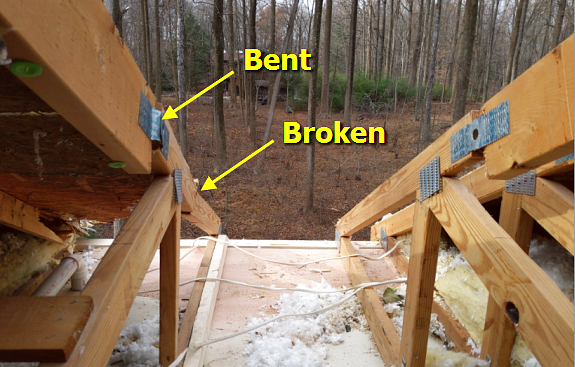
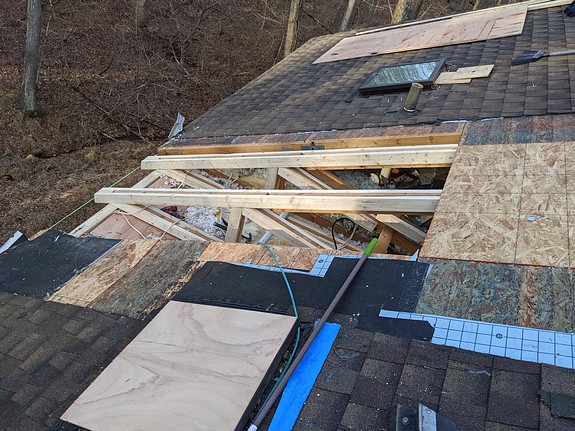
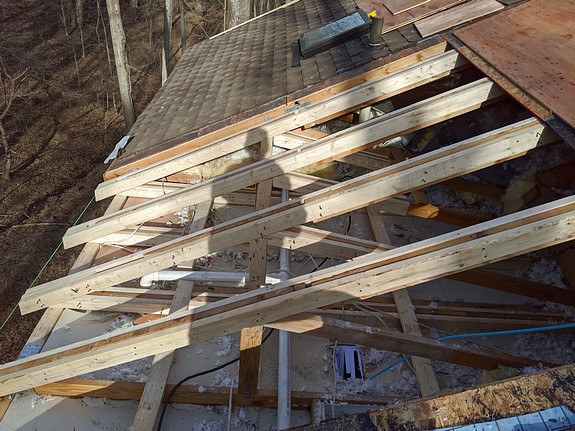
 OK, moving ahead and deconstructing the mess we're finding that a few of the trusses areseverely damaged. |
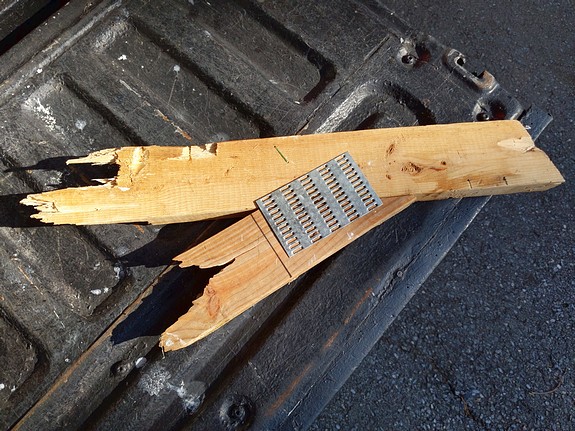 In fact, two of the trusses were in this condition... the ends completely broken through and barely hanging by a thread. This is the part that actually supports the entire truss and rests on the exterior wall. |
 |
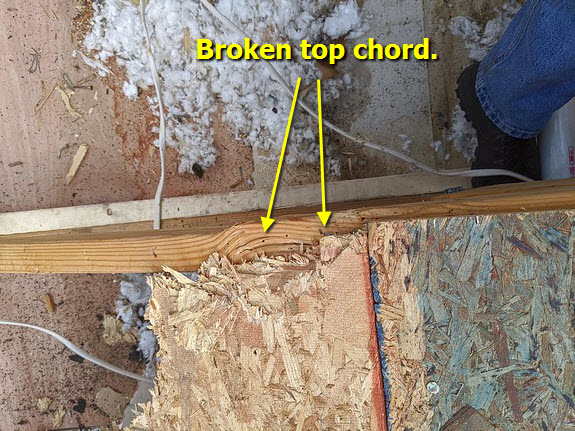 Top chords and support struts were damaged, twisted, and out-of-position in many places as well. |
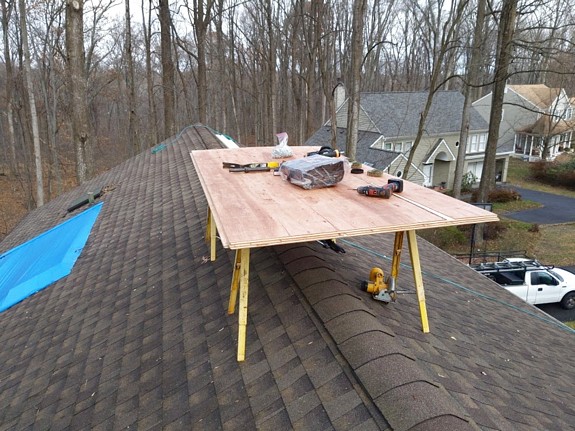
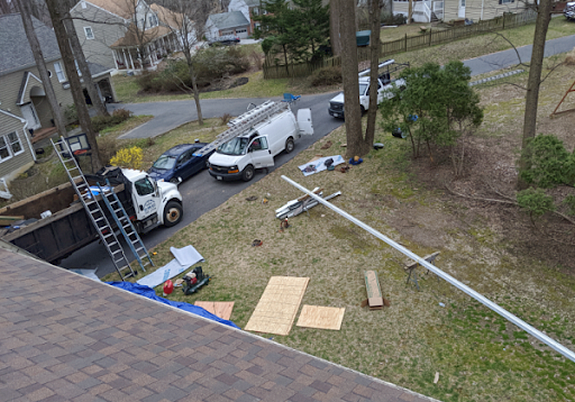
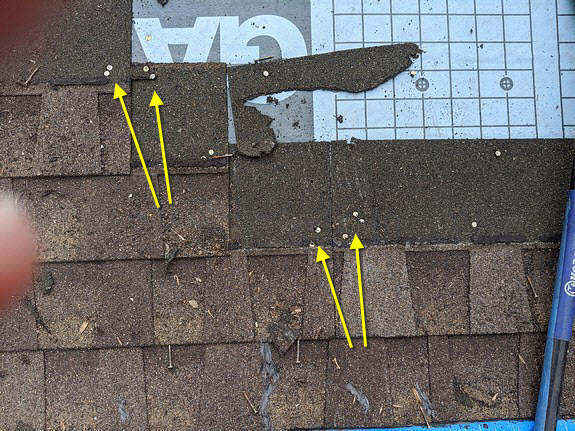 Unfortunately the previous contractor "overnailed" a few sections of shingles (causing minor leaks). No problem since we're replacing the entire roof; but for now only 2 squares of roofing and underlayment are being removed for the local structural repairs. |
 |
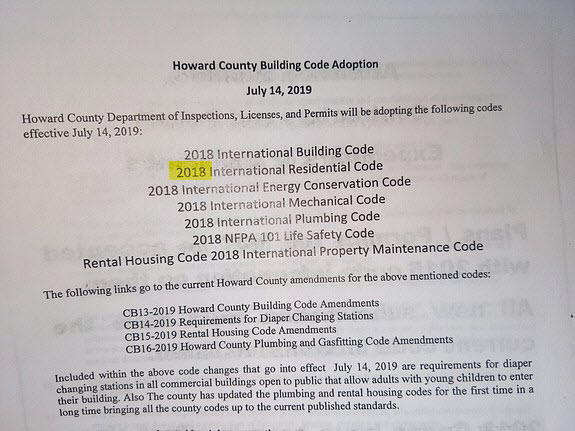
 And now noting that some of the damage is
serious... we're ready to secure a building permit from the county (as per requirement). ...so the
drawings had to be corrected and re-submitted, and the resulting time lost pushed us past the
Christmas holidays for additional construction... |
 |
 |
|
We finally
acquired the permit and resumed work. |
 Now the "thing" about repairing broken trusses; it's a process! Measuring, string lining, tweaking, clamping, re-measuring, calibrating ... is all part of fitting new materials together with the surrounding construction. It's time consuming, but worth it; the system will end up much stronger than the original factory trusses. |
 Scabbing the first two trusses here with #10 Common nails (not sinkers or pneumatic nails) as specified for strength. |
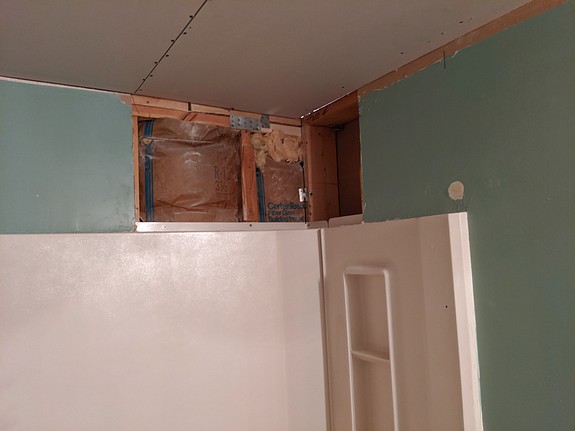
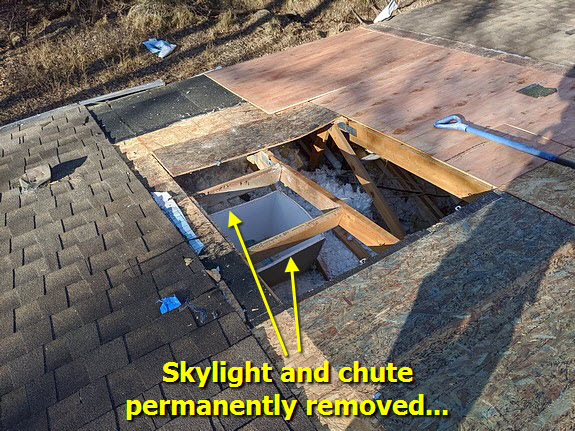 As we progressed it was decided that the skylight and chute will be eliminated. We also noted that the skylight had been leaking for quite a while, causing the need to re-frame and replace the plywood in that area... |
 The remainder of the chute will be removed from the intereior as the bathroom ceiling is replaced |
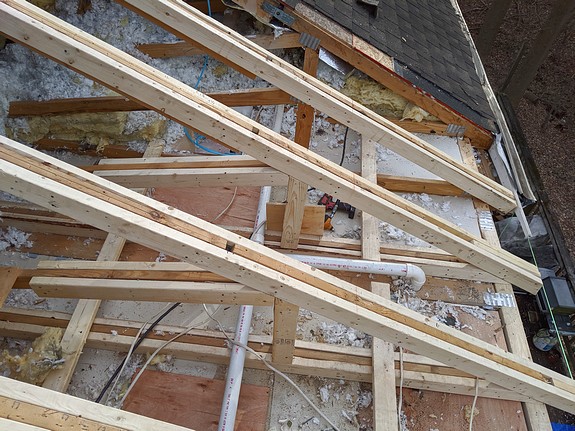
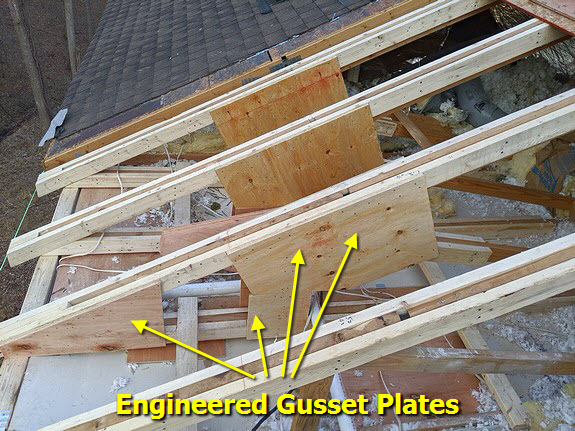
 Now all four damaged trusses have been rebuilt, re-leveled (and plumbed) and are ready for the gussets. |
 Nice! |
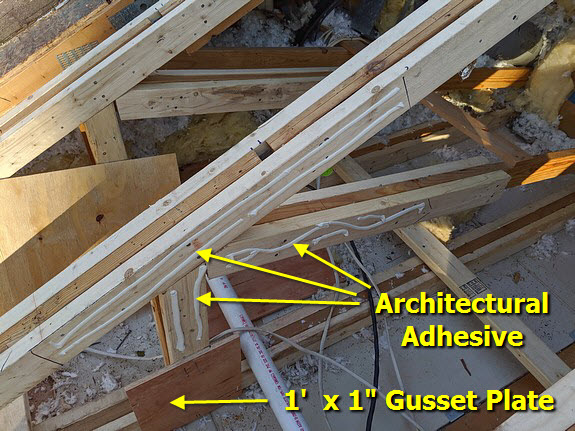 We'll use 1/2" exterior plywood (5 ply for strength!) and #6 commons (3") for added strength as well. |
 Voila! Almost all trusses are done and ready to go. |
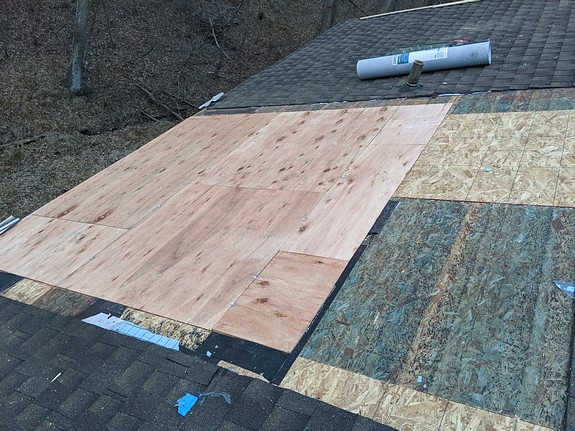 Next, 1/2" CDX 5-ply. Nice! |
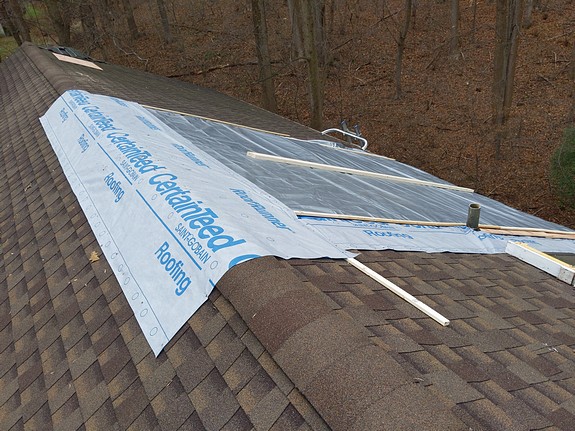
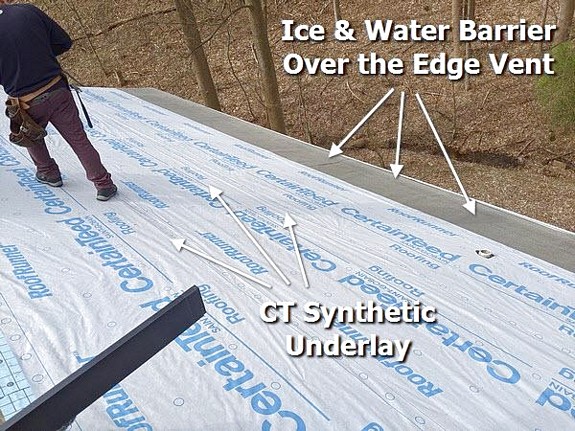
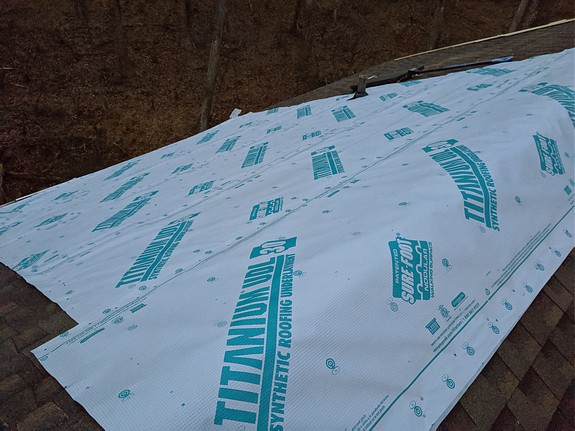 Then Titanium UDL synthetic underlayment (the best!) is permanently installed, and the area is now completely waterproof once again. Now we're ready to "change out the
ceiling drywall, and eventually the attic insulation will be moved back into place. Ventilation
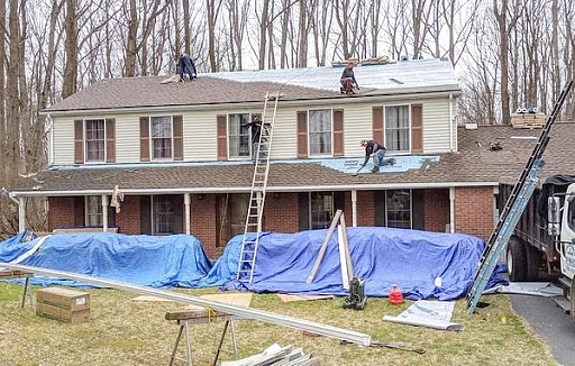
issues will be addressed, and a new CertainTeed Landmark Lifetime Architectural Roof will be
installed. |
 A view of the fancy gussets from the end. Strong!! |
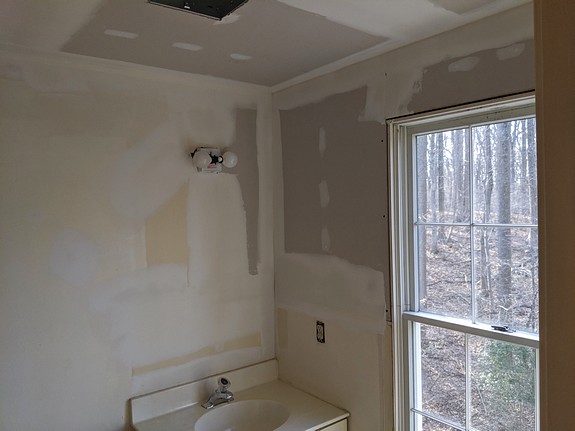
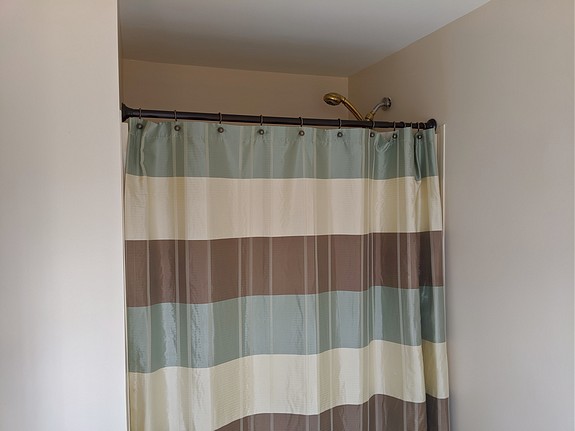
 Ceiling drywall removal in the "hall" bathroom. |
 |
 |
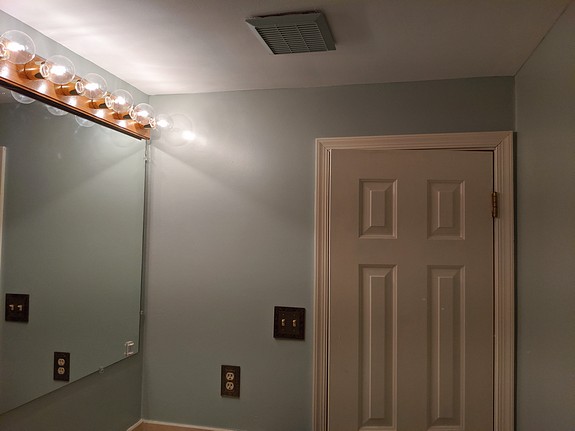
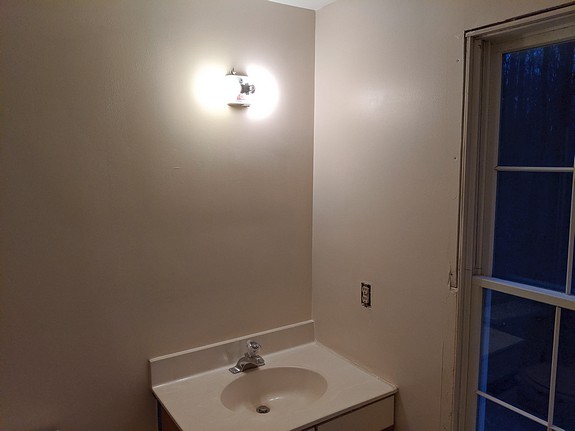
 Two coats of compound... |
 3 coats + wall and ceiling paint (Kilz primer + 2 coats ceiling paint. |
 |
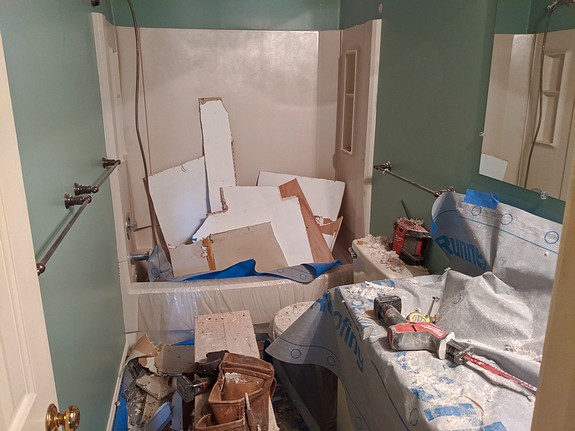
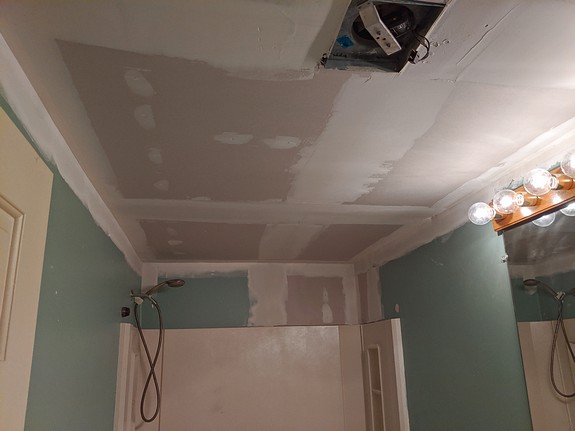
 Now for the master bath that was destroyed by the Big Poplar. |
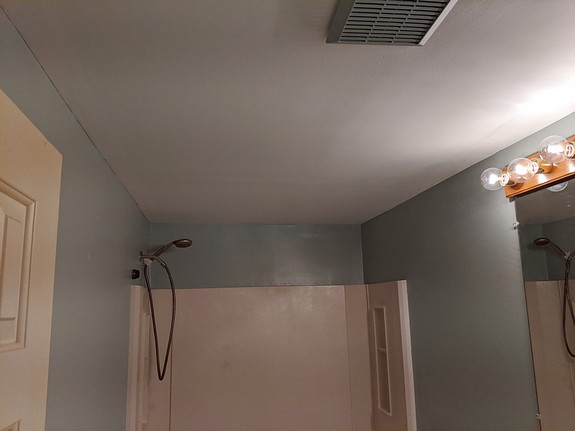
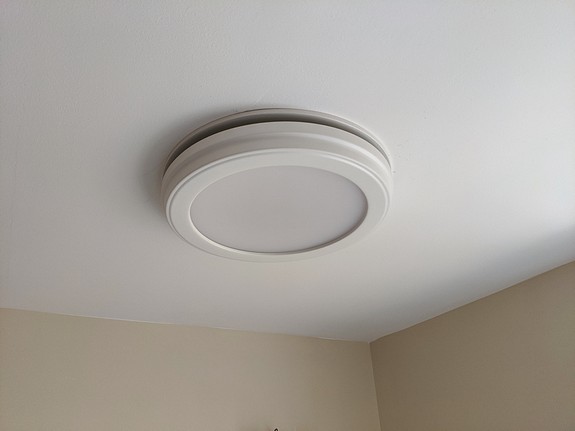
 Super fancy ceiling fan, light, and humidistat!! |
 |
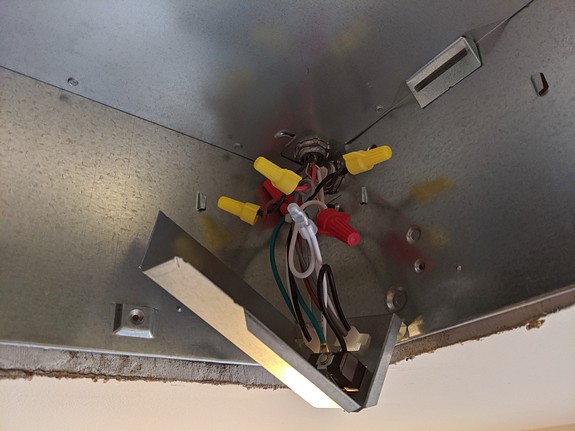 Yep, 3 controls and "five wire." |
 Perfecto. |
 |
 |
 This is the "after" photo of the new CertainTeed Lifetime Landmark Roof. |
 |
 |
 |
 |
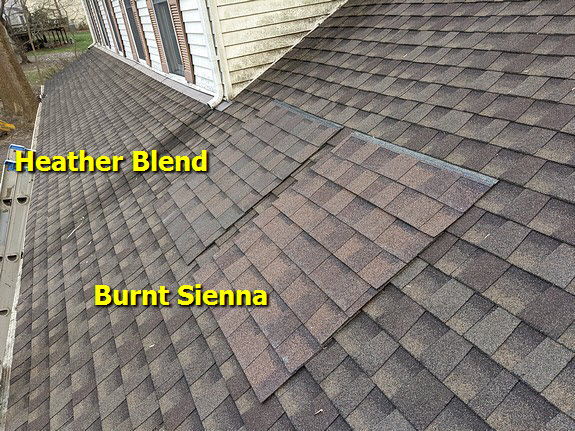
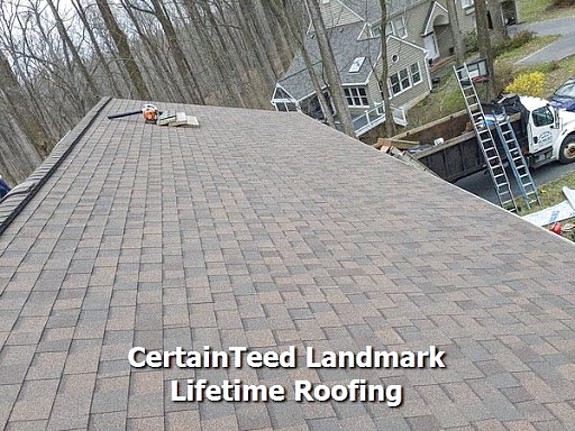 Nice 'n straight. CertainTeed has the best colors and patterns. |
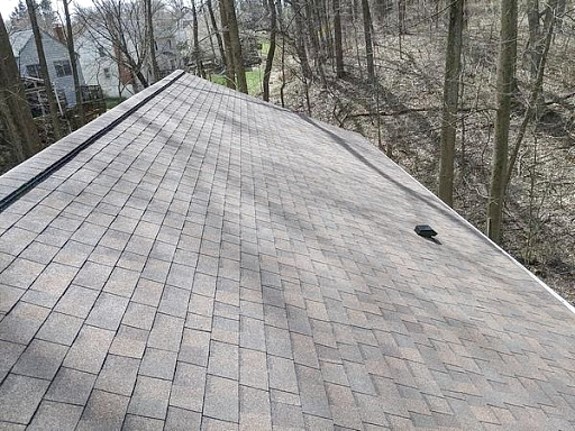 This is where all of the damage occurred. Now it's the strongest part of the roof! |
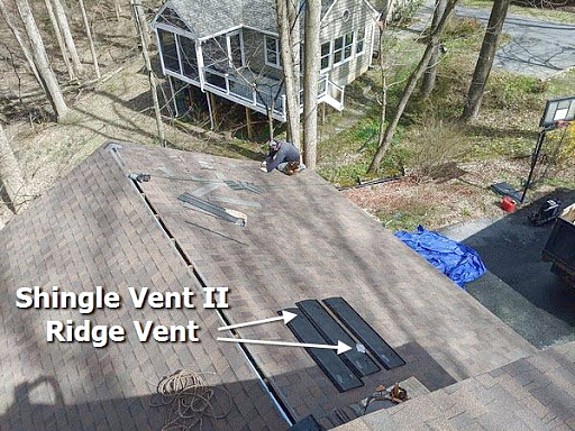
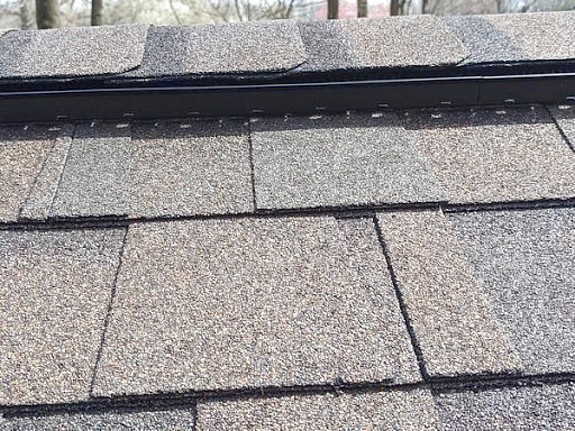 The Shingle Vent II will move way more air than the old vent; plus we enlarged the slot a bit. |
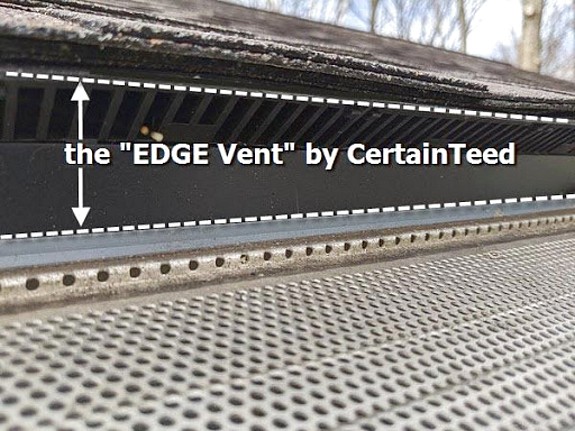 This new Edge Vent will pay for itself in energy savings in about 3 years... AND it will remove humidity in the summer and winter without using any power. It's the new green deal. Check out our video of an Edge Vent Installation we did a while back... |
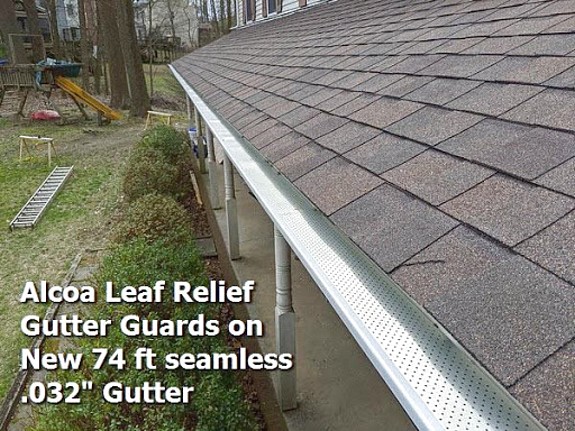 This .032" gutter with the interlocking Alcoa Leaf Relief guards are the strongest setup on the market. |
%20837-7400.png "Press to Call (443) 837-7400") |